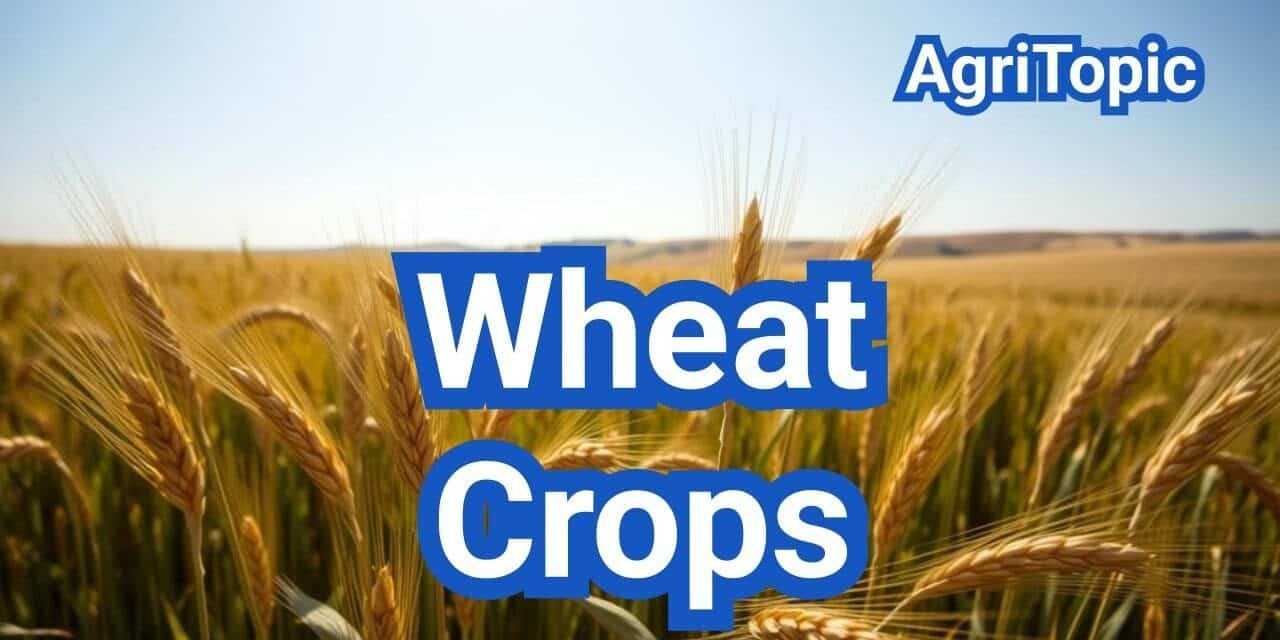
Quick Answer: Wheat grows best where an adapted variety can establish in well-drained soil, access enough moisture, and complete grain development without severe heat or water stress. Major U.S. production areas include the Great Plains, Pacific Northwest, and eastern winter-wheat regions. Start with local growing conditions and buyer requirements, calculate planting rates from the actual seed lot, and base disease management on crop stage, weather, and field risk.
Two wheat fields in the same county can need different management. Their previous crops, soil moisture, seed lots, and intended grain markets may lead to different variety choices, planting rates, and treatment decisions.
This guide helps U.S. growers work through those choices in a practical order. It explains how to assess a field, compare wheat classes and varieties, calculate seed needs, evaluate establishment, and protect grain quality. Regional examples show why a useful recommendation must also fit the conditions of the field where it will be used.
Key Takeaways
- Choose a wheat class that fits both the growing environment and an available grain market.
- Compare varieties using several relevant trial results, disease ratings, maturity, and grain-quality requirements.
- Distinguish planted seeds, viable seeds, and established plants before calculating pounds of seed per acre.
- Use crop growth stages to separate decisions about leaf protection, head-blight management, and grazing termination.
- Evaluate extra inputs against realistic crop potential, and prepare drying and storage capacity before harvest.
Where Do Wheat Crops Grow Best?
Wheat grows best when its growth habit and maturity fit the local season, its roots have access to moisture and nutrients, and the field drains well enough for healthy establishment. A location can produce excellent wheat without being suitable for every wheat class or variety.
The practical question is whether a particular field can support the intended crop through establishment, winter survival where applicable, flowering, and grain filling. Rainfall totals alone cannot answer that question. Soil depth, drainage, stored moisture, irrigation capacity, and the timing of hot or dry weather also matter.
Use the production region as a starting point
The USDA overview of the U.S. wheat sector explains the broad geographic distribution of wheat classes. These patterns help narrow the options, but local variety trials and field conditions should guide the final choice.
| Production area | Common wheat options | Questions to resolve locally |
|---|---|---|
| Central and Southern Great Plains | Hard red winter wheat | Will stored moisture, winter survival, disease resistance, and any grazing plans support the variety? |
| Northern Great Plains | Hard red spring wheat and durum, with winter wheat in suitable areas | Does maturity fit the season, and can the crop meet protein and disease-management requirements? |
| Midwest, Mid-Atlantic, and Southeast | Soft red winter wheat | How will drainage, humid-weather diseases, lodging, and the following crop affect management? |
| Pacific Northwest | Soft white wheat and other locally adapted classes | Which varieties fit the field’s precipitation zone, soil depth, and disease history? |
| Desert Southwest and parts of California | Irrigated durum and other adapted wheat | Does the cool-season planting system fit water availability and the intended market? |
Check the field’s limiting condition
Walk the field before choosing an input program. Poor drainage, a compacted layer, excessive acidity, uneven residue, or persistent grass weeds can limit the crop even when the regional climate is suitable. Identify the constraint that needs correction before spending more on seed or fertilizer.
Use a soil test to evaluate pH and nutrient needs. For example, University of Georgia wheat guidance uses a soil pH range of 6.0 to 6.5. That is a regional recommendation, not a reason to apply the same lime program to every U.S. wheat field. Follow locally calibrated test interpretations.
A useful field assessment records the previous crop, drainage problems, soil-test results, available moisture, recurring weeds, and any disease history. Keep that assessment beside the variety shortlist so that the seed decision addresses the field’s actual limitations.
Choose a Wheat Class Before Comparing Varieties
A wheat class identifies grain characteristics important to buyers and processors. A variety, also called a cultivar, is a named selection within a class. Choosing a locally productive variety has limited value if the available buyer does not accept its class or if the farm cannot keep it separate from other grain.
The six principal U.S. market classes and their common uses are described by U.S. Wheat Associates.
| Market class | Common end uses |
|---|---|
| Hard Red Winter | Bread, rolls, and flour blends |
| Hard Red Spring | Strong bread flour, bagels, and pizza dough |
| Soft Red Winter | Cookies, crackers, and cakes |
| Soft White | Cakes, pastries, and selected noodle products |
| Hard White | Bread, whole-wheat products, and noodles |
| Durum | Semolina, pasta, and couscous |
Winter and spring describe growth habit rather than a complete set of market classes. Winter wheat requires a period of cold exposure for normal reproductive development. Spring-habit wheat does not have the same requirement and can be planted during the cooler season in some mild-winter production areas.
Before ordering seed, confirm the buyer’s accepted class, quality specifications, delivery arrangements, and any identity-preservation requirements. For a specialty or contract crop, establish the market before committing acreage.
Build a Field-Specific Variety Shortlist

Start with varieties tested in environments similar to the field being planted. A high yield from one favorable trial does not establish reliable performance across different soils, weather patterns, or disease pressure.
Compare several locations and, when available, two or three years of results. Read the trial notes, including management conditions and statistical comparisons. Penn State’s guidance on using variety-trial reports explains how these results support a more informed seed decision.
Choose traits that address a specific risk
| Field or business requirement | Traits to examine | Evidence to use |
|---|---|---|
| Dryland production with limited stored water | Adaptation, maturity, and establishment characteristics | Trials from comparable moisture environments |
| Repeated disease problems | Resistance to the diseases that occur locally | Current disease ratings and field history |
| High fertility or a history of lodging | Straw strength and plant height | Lodging scores under relevant management |
| A following crop with a tight planting window | Maturity and harvest fit | Local maturity comparisons and rotation records |
| A market with specific grain requirements | Protein, test weight, and other contract traits | Quality data and buyer specifications |
| Combined grazing and grain production | Forage performance and first-hollow-stem timing | Dual-purpose variety information |
State variety guides can help connect these traits to individual cultivars. The Kansas Wheat Variety Guide, for example, provides an additional screening tool for growers considering wheat adapted to that production environment.
Keep a reason for each variety on the list
For each candidate, write down the main reason it fits the field and the main risk that remains. This makes it easier to compare a slightly higher-yielding variety with one that has stronger disease resistance or a better harvest window.
Where acreage allows, using more than one suitable variety can spread management demands and exposure to a single weakness. The selections should still fit the farm’s grain segregation, planting, and harvest capacity.
Set Planting Dates and Prepare the Seedbed
A planting date should balance establishment, seasonal development, pest pressure, and the intended use of the crop. A statewide date range is only a starting point because elevation, latitude, soil conditions, and production system can change the useful window.
Plan winter and spring wheat around different constraints
Winter wheat needs enough favorable fall weather to establish before severe cold. Planting very early may increase exposure to insects, viruses, and excessive fall growth; planting late can reduce tillering and leave a weaker stand. Use county or regional Extension guidance to balance those risks.
For spring wheat, timely planting helps the crop use cooler conditions during early development. The University of Minnesota planting-date guide explains how delayed planting can expose later development to more heat and reduce yield potential. Soil must also be fit for equipment and seed placement.
Hessian fly guidance is regional. Where an established fly-free date is part of local recommendations, include it in the planting decision. Do not assume that the same calendar rule applies in all wheat-growing states.
Grazing changes the plan because forage production may favor earlier planting and a different seed rate. Decide whether the field is intended for grain only, forage only, or both before setting the planting schedule.
Make the seedbed support uniform placement
Check whether residue is spread evenly, openers can reach the intended depth, and the closing system provides consistent seed-to-soil contact. In no-till fields, inspect for residue pushed into the seed slot. In tilled fields, avoid an excessively loose seedbed that causes variable placement.
Review the previous crop and pesticide history before planting. A rotation can change disease exposure, available nutrients, residue conditions, and herbicide restrictions. These effects need separate checks; a previous crop does not automatically make a field suitable or unsuitable for wheat.
Use a locally appropriate planting depth
Planting depth must fit moisture, seedbed conditions, and the variety’s ability to emerge. As one regional example, Minnesota winter-wheat guidance recommends approximately 1 to 1.5 inches. That recommendation should not be treated as a universal prescription for every dryland or irrigated system.
Dig behind the drill at the beginning of the field and again when soil conditions change. Measure actual seed depth and check slot closure. Increasing seed quantity will not correct seed that is consistently placed beyond its emergence capacity.
Calculate Wheat Seeding Rates from the Seed Lot
Pounds per acre are the final equipment setting, but the calculation should begin with a clearly defined population target. Seed lots differ in seed size and germination, so the same weight can produce different numbers of plants.
Identify the unit used by the recommendation
Three quantities are easily confused: total seeds planted, viable seeds planted, and plants expected to establish. Record which one the local recommendation uses before entering numbers into a calculator.
NDSU’s small-grain guidance gives desired stands of approximately 0.9 to 1.0 million plants per acre for winter wheat and 1.3 to 1.4 million for spring wheat and durum. These are regional plant-population targets, not universal national seeding rates.
In contrast, North Carolina wheat guidance discusses approximately 1.6 to 2.1 million seeds per acre. The different terminology matters: a seed recommendation cannot be compared directly with an established-plant target without understanding the assumptions behind each.
Use the formula that matches the target
When the target is established plants per acre, use:
Pounds per acre = target plants per acre ÷ (seeds per pound × germination fraction × establishment fraction)
The establishment fraction represents the expected proportion of germinated seeds that become established plants. Keep this separate from laboratory germination. If an emergence estimate already includes non-germinating seed, applying both losses again would overstate the seed requirement.
When the recommendation is expressed as viable seeds per acre, use:
Pounds per acre = target viable seeds per acre ÷ (seeds per pound × germination fraction)
The University of Minnesota seeding-rate method explains how seed size, germination, and expected stand losses affect the calculation.
Work through an example using the actual seed lot
Assume a target of 1,300,000 established plants per acre, a seed lot containing 14,000 seeds per pound, 95% germination, and 90% establishment after germination:
1,300,000 ÷ (14,000 × 0.95 × 0.90) = 108.6 pounds per acre
The calculated setting is approximately 109 pounds per acre. This is an illustration of the method, not a recommended rate for every field.
Keeping the same population, germination, and establishment assumptions shows why seed size matters:
| Seeds per pound | Calculated pounds per acre |
|---|---|
| 10,000 | 152.0 |
| 14,000 | 108.6 |
| 16,000 | 95.0 |
Larger seeds mean fewer seeds per pound, so more pounds are needed to deliver the same population. Use the seed lot’s measured characteristics rather than assuming that every lot of the same variety has identical seed size.
Finish with drill calibration
Calibrate using the seed that will actually be planted, including its treatment or coating. Check output across several metering units and verify the planted area used in the calculation. A correct spreadsheet cannot compensate for an incorrect drill setting or uneven delivery.
Adjustments for late planting, expected tillering, or difficult establishment should follow local recommendations. Record why the target changed so that the resulting stand can be compared with the original expectation.
Check Establishment Before Changing Inputs
After emergence, determine whether the field has the population and uniformity assumed in the planting plan. Count actual plants, inspect gaps, and look for differences associated with residue, low areas, wheel tracks, soil texture, or seeding passes.
Count plants in a known area
A one-square-foot sampling area can be calculated from row spacing. With 7.5-inch rows, a 19.2-inch length of one row represents one square foot because 7.5 × 19.2 = 144 square inches.
Count plants in several representative locations and keep problem areas separate from the field average. Record plant numbers before tillers become difficult to distinguish, and note whether gaps are scattered or concentrated in large patches.
Convert the average to plants per acre by multiplying plants per square foot by 43,560. Use that result to compare actual establishment with the target used in the seed calculation.
Diagnose a poor stand before trying to compensate
Uneven emergence can result from depth variation, dry seed zones, crusting, poor slot closure, seed quality, disease, or feeding damage. Dig in both healthy and weak areas. The condition of ungerminated seed, roots, and seedlings often provides more useful information than the appearance of the field from the road.
A thin but uniform stand and a field with large bare patches are different management problems. Additional nitrogen cannot replace missing plants in empty areas or correct an unresolved root problem.
For winter wheat, evaluate survival after spring growth resumes. Use local stand-assessment and replant guidance, accounting for tillering, the remaining season, alternative crops, and costs. A fall count alone may not describe the productive stand available in spring.
Match Nitrogen and Water to Crop Potential

Build the fertility plan from soil information, previous crops, nutrient credits, and realistic production potential. A high yield goal should have support from field history, available water, and the condition of the current stand.
Separate nutrient requirement from fertilizer purchase
Residual soil nutrients, manure, and previous crops may supply part of the crop’s needs. The fertilizer purchase should account for those contributions. Use soil nitrate testing where local recommendations are calibrated for it, and follow appropriate sampling depths and timing.
University of Minnesota wheat-fertility guidance illustrates how soil tests and cropping history influence recommendations. Its regional rates should be interpreted within the conditions for which they were developed.
Phosphorus, potassium, sulfur, and pH limitations also deserve attention. Do not assume that every pale or uneven area needs additional nitrogen. Root damage, waterlogging, disease, or another nutrient limitation may produce a similar appearance.
Match nitrogen timing to growth and the market
Winter-wheat programs commonly divide nutrient decisions between establishment and spring growth. Spring-wheat programs have a different timetable. In either system, consider application access, loss risk, crop demand, and the likelihood that rainfall or irrigation will move fertilizer into the root zone.
Yield and grain protein are related but separate management objectives. A protein premium may justify a different decision from one made for a soft-wheat market. NDSU’s hard red spring wheat and durum guidance considers regional responses and economic factors when developing nitrogen recommendations.
Reassess the plan when stand loss or drought changes crop potential. Additional fertilizer should have a plausible route to improving saleable production or meeting a documented quality requirement.
Manage water as a field constraint
In dryland systems, soil cover, residue management, and rotation can help protect the soil and improve water management. The NRCS soil-health principles provide a framework for maintaining cover, limiting unnecessary disturbance, and supporting soil function.
Where irrigation is available, use measured soil moisture, rooting depth, weather demand, and system capacity to schedule applications. Keep records of where water accumulates or runs off, and correct distribution problems before assuming that an entire field needs more water.
Water and nitrogen plans should agree. A field with sharply reduced yield potential may not support the same additional input spending as a healthy crop with adequate moisture.
Scout and Treat by Growth Stage and Disease Risk
Scouting should answer a management question: what is affecting the crop, how widely is it distributed, and is there an effective action available at the current stage? Record healthy areas as well as symptoms so that changes can be evaluated over time.
Use growth stages to identify the decision window
The South Dakota State University wheat growth-stage guide explains the Feekes scale. These landmarks help distinguish decisions that occur weeks apart.
| Feekes stage | Crop landmark | Management relevance |
|---|---|---|
| 1–3 | Emergence and early tillering | Assess establishment, weeds, and early crop health. |
| 6 | First stem node detectable | Confirm stage-dependent input restrictions and crop development. |
| 8 | Flag leaf beginning to emerge | Assess upper-canopy disease risk. |
| 9 | Flag leaf fully emerged | Evaluate the need for leaf protection. |
| 10 | Boot stage | Prepare for heading and flowering assessments. |
| 10.5 | Head emergence complete | Check progress toward flowering. |
| 10.5.1 | Beginning flowering | Assess the head-blight treatment window. |
| 11 | Ripening | Plan harvest and grain handling. |
Check representative stems across the field. Uneven emergence or mixed maturity can mean that a single plant does not represent the stage of the whole crop.
Prevent virus problems before the new crop emerges
Volunteer wheat and other suitable hosts can maintain pests and viruses between crops. For wheat streak mosaic and related risks, the timing of volunteer control is a planting decision.
Oklahoma State University guidance on wheat streak mosaic and High Plains viruses recommends that volunteer wheat be dead at least 14 days before the new wheat emerges. Spraying volunteers on the day of planting does not necessarily create that host-free interval.
Use adapted resistance where available and investigate suspicious patches early. A foliar fungicide does not cure a virus-infected plant.
Separate leaf-disease decisions from head-blight decisions
For rusts and leaf spots, consider the variety’s susceptibility, disease presence, affected leaf layers, weather, and remaining yield potential. A treatment decision should identify which disease is being targeted and which healthy tissue can still be protected.
The Crop Protection Network wheat fungicide efficacy guide compares activity against specific diseases. Products with useful activity against one disease may differ in their performance against another.
A low-risk field does not automatically benefit from an additional application. Conversely, a susceptible crop with active disease and favorable infection conditions may need prompt evaluation within the permitted application window.
Assess Fusarium head blight around flowering
Fusarium head blight risk reflects weather near flowering, variety susceptibility, and available inoculum. Corn and cereal residues can increase exposure, but that does not create a universal prohibition on planting wheat after those crops.
Combine resistance, rotation planning, local forecasting, and a correctly timed labeled product when treatment is justified. A flag-leaf fungicide application should not be assumed to provide the same protection as an appropriately timed head-blight treatment.
The Crop Protection Network overview of Fusarium head blight explains the disease and its relationship to deoxynivalenol, or DON. Visible symptoms alone do not reliably establish toxin concentration. Use representative grain sampling and testing when contamination is a concern.
Diagnose weeds and insect pressure separately

Identify the species present, estimate its abundance, and use local economic thresholds where available. A patch of yellow wheat may reflect insects, nutrient stress, waterlogging, or disease; treatment should follow diagnosis.
Keep records of recurring grass weeds and escapes. Review rotation options and the weed-control program rather than repeatedly relying on the same intervention without checking its results.
Before any pesticide application, check the labeled crop, target, rate, growth-stage restrictions, harvest interval, protective equipment, and other required conditions. The EPA explanation of pesticide labels describes their role in directing lawful use.
Use first hollow stem to manage dual-purpose wheat
When both forage and grain are intended, monitor first hollow stem before jointing. It occurs when approximately 5/8 inch, or 1.5 centimeters, of hollow stem is present below the developing head.
Inspect plants from an ungrazed area of the field so that grazing effects do not mask development. Oklahoma State University’s first-hollow-stem guide explains how to recognize the stage and use it when deciding when to remove cattle.
Grazing income should be evaluated together with its effects on grain production and management costs. Earlier planting, higher seed needs, and grazing termination create tradeoffs that belong in the field plan.
Protect Grain Quality from Harvest Through Storage

Harvest planning should begin before grain is ready for the combine. Confirm equipment capacity, drying arrangements, storage condition, grain segregation, and the buyer’s testing requirements while there is still time to correct problems.
Distinguish maturity from safe storage moisture
Physiological maturity means that kernels have reached their maximum dry weight. It does not mean that they are dry enough for safe storage. The University of Minnesota preharvest guide explains this distinction and the risks associated with delayed harvest.
Base harvest timing on grain condition, weather exposure, equipment, and drying capacity. Where weather threatens quality, timely harvest followed by appropriate drying may offer advantages, but the decision must include drying costs and available capacity.
Check combine losses and grain damage when field conditions change. Keep grain from fields with different quality concerns separate until testing establishes how it can be marketed or handled.
Dry, cool, and monitor stored wheat
Minnesota guidance on storing wheat and barley recommends moisture of 14% or less for storage shorter than six months and 13% or less for storage longer than nine months. Storage temperature, climate, grain condition, and intended duration also affect risk.
Clean the storage system before filling, manage fines and uneven airflow, and use aeration appropriately. Monitor grain temperature, moisture, odors, and insect activity after filling; an acceptable initial moisture test does not guarantee that every part of a bin will remain in good condition.
When head blight or another quality problem is suspected, arrange representative sampling and discuss testing requirements with the buyer. Drying can help prevent further deterioration, but it does not remove DON already present in the grain.
Check Costs and Avoid Common Planning Mistakes

A useful wheat budget separates the planned production system from additional in-season decisions. Seed, fertilizer, field operations, land costs, drying, and storage all belong in the full budget. A proposed extra treatment needs its own assessment of cost and likely benefit.
Use regional enterprise budgets as a starting point and replace their assumptions with farm records and current quotes. NDSU’s projected crop budgets demonstrate why costs and returns vary by location and production system.
Calculate the yield needed to pay for an extra treatment
A simple comparison is:
Additional bushels needed per acre = additional treatment cost per acre ÷ expected grain value per bushel
For an illustrative treatment costing $30 per acre and wheat valued at $6 per bushel, the treatment needs 5 additional bushels per acre to cover that cost before any added harvest or handling expense. These figures are examples, not current market prices or a predicted response.
The calculation does not show that the treatment will produce those bushels. Use disease risk, crop condition, trial evidence, and the remaining response window to judge whether that outcome is plausible. Avoided quality discounts may also matter when they can be supported by the specific situation.
Keep one decision record for each field
- Before planting: record the buyer, wheat class, variety, soil results, previous crop, and main production risk.
- At planting: record the seed lot, seeds per pound, germination, population target, calculated rate, depth, and calibration result.
- After emergence: compare the actual stand with the expected population and document problem areas.
- During spring growth: update the nutrient plan, crop potential, growth stage, and scouting observations.
- Near flowering: document head-blight risk and the reason for any treatment decision.
- At harvest and storage: record yield, moisture, quality results, drying, and storage observations.
Several avoidable mistakes become visible in this record: copying last year’s pounds per acre despite a different seed size, applying nitrogen before diagnosing a weak stand, confusing leaf-disease and head-blight timing, or filling storage before checking grain condition.
For broader planning across the rotation, conservation practices, and farm returns, see AgriTopic’s sustainable wheat farming guide.
Wheat Crops FAQ
What are the different types of wheat crops?
The six principal U.S. market classes are Hard Red Winter, Hard Red Spring, Soft Red Winter, Soft White, Hard White, and Durum. Winter and spring describe growth habits, while a named variety identifies a particular cultivar within a class.
Why is it illegal to grow wheat?
Growing wheat is not generally illegal in the United States. The claim often confuses historical federal production controls with a blanket ban. The 1942 case Wickard v. Filburn concerned the reach of those historical controls; it did not establish that all wheat cultivation is prohibited.
The current statutory notes on suspended agricultural provisions also address specified historical wheat-quota provisions for wheat planted for harvest in 2026. Questions about a particular seed agreement or land-use restriction are separate from the claim that growing wheat itself is generally banned.
What are the top 5 states that produce wheat?
Using total all-wheat production for the 2025 crop, the five leading states were Kansas, North Dakota, Montana, Washington, and Idaho. Their production was approximately 346.8 million, 334.1 million, 181.7 million, 141.5 million, and 106.6 million bushels, respectively, according to the USDA 2025 Crop Production Annual Summary. Rankings can change by year and differ when measured by acreage or by an individual wheat class.
What are 10 products made from wheat?
Ten common wheat products are bread, rolls, tortillas, pasta, couscous, breakfast cereals, crackers, cookies, cakes, and bulgur. The appropriate wheat class depends on the desired texture and processing characteristics, and individual product recipes can vary.
Final Thought

A useful wheat plan connects the field, the seed lot, the crop’s development, and the grain market. Start with the main production constraint, choose an adapted class and variety, calculate the required seed population, and check whether the established crop matches the plan. Then use scouting, realistic economics, and timely grain handling to guide the remaining decisions. Records from that process provide a practical starting point for the next crop.
Sources & References
- USDA Economic Research Service: Wheat Sector at a Glance
- U.S. Wheat Associates: Wheat Classes
- University of Georgia Extension: High Yield Wheat Production
- Kansas State University: Kansas Wheat Variety Guide 2026
- University of Minnesota Extension: Small-Grain Planting Date
- University of Minnesota Extension: Winter Wheat Seeding Rate and Depth
- University of Minnesota Extension: Seeding Rate for Small Grains
- NDSU Extension: Optimal Seeding Rates for Small Grains
- NC State Extension: Optimal Wheat Seeding Rates
- University of Minnesota Extension: Fertilizing Wheat in Minnesota
- NDSU Extension: Fertilizing Hard Red Spring Wheat and Durum
- USDA NRCS: Soil Health
- South Dakota State University Extension: Growth Stages of Wheat
- Oklahoma State University: Wheat Streak Mosaic and High Plains Viruses
- Crop Protection Network: Fungicide Efficacy for Control of Wheat Diseases
- Crop Protection Network: An Overview of Fusarium Head Blight
- U.S. EPA: Introduction to Pesticide Labels
- Oklahoma State University: First Hollow Stem for Dual-Purpose Wheat Producers
- University of Minnesota Extension: Managing Wheat Before Harvest
- University of Minnesota Extension: Storing Wheat and Barley
- NDSU Extension: Projected Crop Budgets
- USDA NASS: Crop Production 2025 Summary, Published January 2026
- Cornell Legal Information Institute: Wickard v. Filburn
- Cornell Legal Information Institute: 7 U.S.C. § 9092 and Related Statutory Notes